Making a Website With WordPress Instead of a Blog
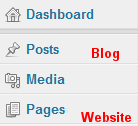 You decide you want to use WordPress for your website but don’t want it to look like a blog. This is both simple and complicated. Simple in the fact that you do the content for your website under “Pages” NOT “Posts”. Complicated in the manner of settings and removing “bloggy type items” in your WordPress Dashboard. You should also choose a theme that is easily customizable and not terminally geared towards a blog. This tutorial will help you turn your WordPress installation into a website. The theme you choose may dictate other settings to adjust, however, this will give you the basics you need.
The first thing you want to do in your DASHBOARD is go to PAGES, click on “Add New”. Title this page “Home”, “Welcome” or anything you want as your main page. You can add your content now or come back to it later. Click Publish when done.

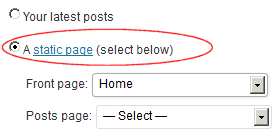
Next, go to SETTINGS / READINGS. Tick the dot that says “A Static Page”. Where it says Front Page, choose the title you made in Pages. Make sure there is no page title selected for Posts Page. If you want a blog section later, you can set up a blog page. This may require doing a special template to keep bloggy type items separate.

Next, go to SETTINGS / DISCUSSION. Turn off (uncheck) everything except “Comments Must Be Manually Approved”. This section may not affect pages directly, but it is a useful thing to do the way WordPress does things. (Loading and checking on the page loads. Some things are loaded, but hidden.)
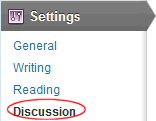

You won’t have comments for a website, however, if a comment box/item shows up accidently somewhere it will prevent it from auto posting. The notice for the posting will alert you to any problems.
Next, go to APPEARANCE / WIDGETS. Remove the following Widgets if they are installed in the sidebar. If they are not installed already, Do Not Use these Widgets. Other widgets will or won’t be useful to you. Check into each one before you choose a Widget.

- Meta
- Categories
- Archives
- Recent Comments
- Recent Posts
THEN PLACE THE PAGES WIDGET IN THE SIDEBAR.
Create your pages in Dashboard/Pages. You may use the built-in editor, visual or text. You may also create the page on your computer in your own editor and paste the code into the TEXT TAB in the built-in editor.
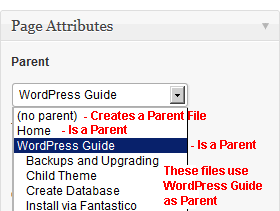
You don’t have Categories in Pages. For your subject/topic headings (that covers the same thing as categories) you have Parent files. When you create a page in Dashboard/Pages, to the bottom right there is “Page Attributes”, with Parent and a drop down box to choose. Your pages will make their own links and nest them automatically in the Pages Widget. Your top horizontal toolbar will nest (drop down title links) automatically.
- (no parent) – Choosing this creates a Parent File. Parent Files will also be on the top toolbar menu.
- Choose a Parent file for the page you are creating if it falls under that.
Using the PAGES WIDGET will create a full site menu of your pages, both Parents and Children. However, you may want to eventually separate the look into separate custom menus of the Parent files and Child files. You can do this with CUSTOM MENUS (if your theme allows).
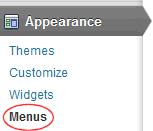
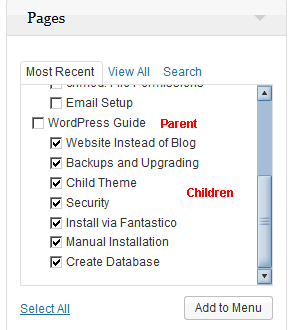
Go to APPEARANCE / MENUS. Click on CREATE A NEW MENU. Just give it a short name, to identify it to you when you need to select to edit. You will give it a proper title name in APPEARANCE / WIDGETS. If you already have pages created that you want under this custom menu, add them now. There is a PAGES list box to the left of the Menu you created. Check off the pages you want to add and click “ADD TO MENU”. If you don’t have pages made yet, just come back later to add them.

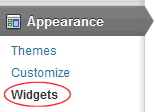
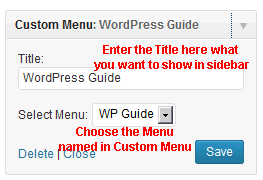
Next, go to APPEARANCE / WIDGETS. Drag the CUSTOM MENU WIDGET to the sidebar if it isn’t already there. Click on the drop down arrow on the widget. Choose the name of the custom menu you created (Select Menu) in the drop box. In the blank next to TITLE, write in the title you want to appear in your sidebar.
With the PAGES Widget and your Custom Menus, your menu might get long and redundant. You might want to drag the PAGES Widget into the INACTIVE Widgets box in APPEARANCE / WIDGETS. Remember that when you create a page, you must manually add it to the custom menu.
That covers the basic things you need to make WordPress a website. There may be a few other things that could need tweaking depending on the theme you choose. The rest is just making your website under PAGES and customizing along the way.
Finding lines and spaces gone from your page?
The page editor/creator in WordPress is a bit peculiar. If you switch between Visual and Text editor, a few things like blank lines, spaces and some things sometimes will be stripped out. Best to pick one or the other editor. If you use Visual and have to add something in the text tab/editor, then only edit with the text editor for that page.
To force a blank line separator when it keeps being stripped (even in text/tab they strip out), use <p> </p> then enter
or <br> then enter
or for a big space between content use
<div style="clear:both;"> </div>